

What is ISO in Photography?
Para leres este Post em Português, clica aqui.
.
The exposure triangle consists of: ISO, Shutter Speed and Aperture. Understand and know how to use them, is the basic of every amateur or professional photographer and its going to help you on every photo you take.
It’s not easy if you are now starting, so read with attention and then practice on your camera. Let’s start then!
ISO
I will not enter into many technical details neither will I tell you about the history from the first cameras to the more recent digital cameras. I wil try to explain through simple words, with some examples.
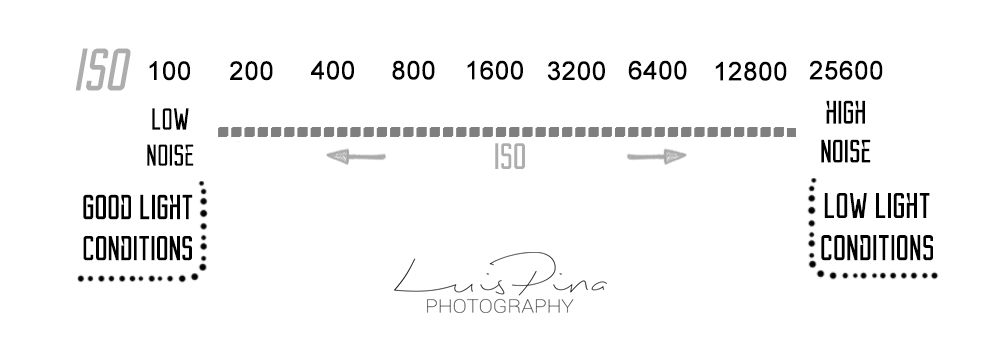
ISO is the sensibility of the sensor from the camera, an old convenction since the photographic film time, which was also adopted on the digital cameras. The lower the ISO, the less light sensibility from the sensor.
Writing on easier terms, a lower ISO (tipically 50, 100, 200 or 400) is used when the subject or scene that you are photographing is well illuminated. When this subject or scene is poorly illuminated, for example inside a room with too less light, a higher ISO will increase the light in the photo, not being so dark.
A higher ISO will lead to an increase of noise (degradation) of the photo. The quantity of noise will depend from which camera you have, but it’s always recommended to use the lowest possible ISO, to have the best quality photo.
Below is a diagram describing what I wrote before:
Look how increasing the ISO, a photo that was once dark, is now well exposed.
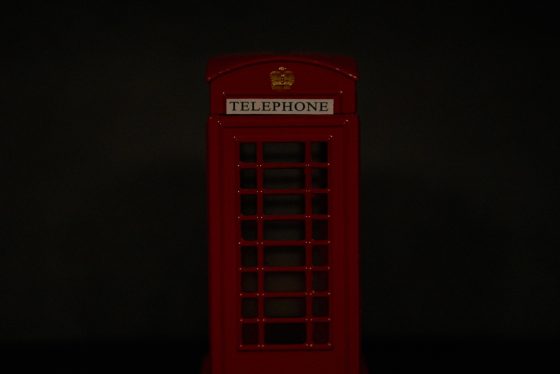
High ISO – Bright Photo
You can see how by raising the ISO, the photo that is taken with the same Shutter Speed and same Aperture, is much brighter than the one taken with a low ISO.
Raising the ISO, comes at a cost, which is the noise of the photo.
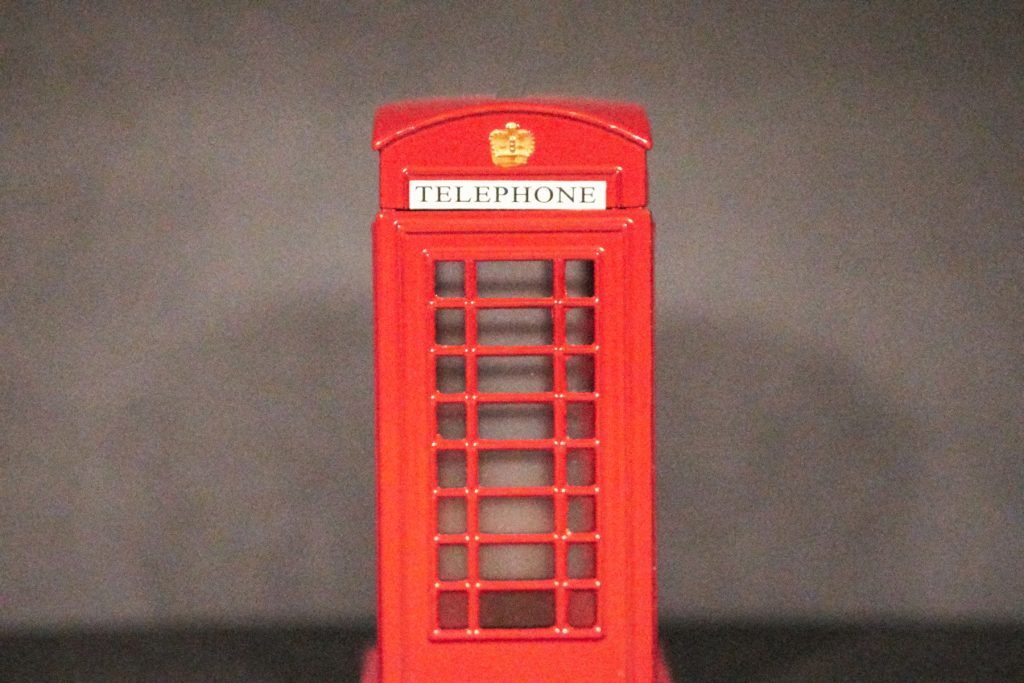
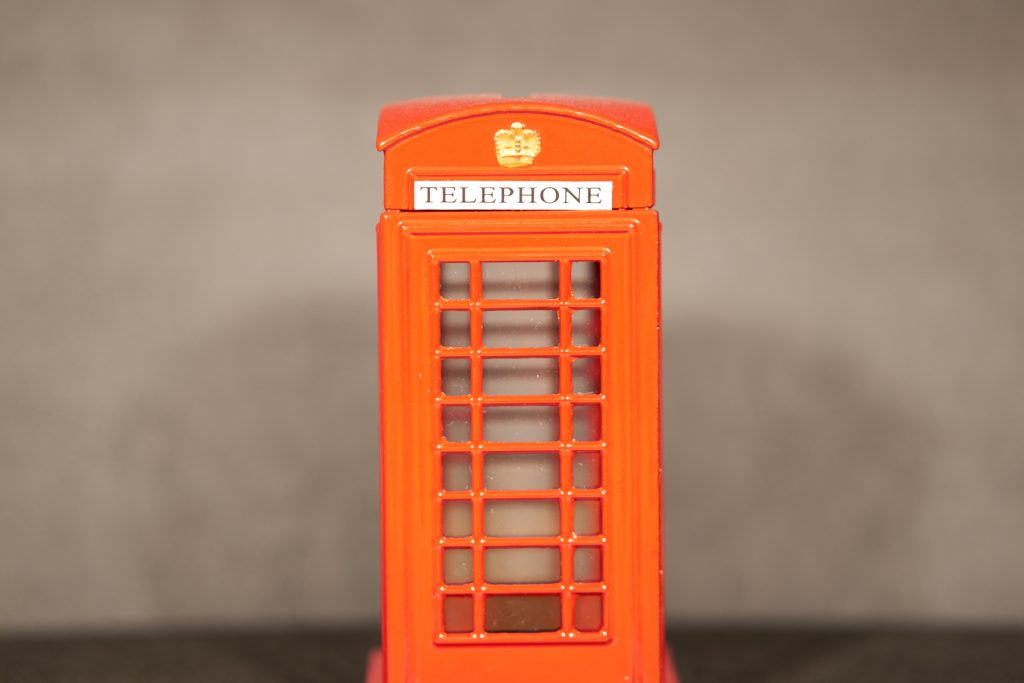
See below how a well exposed photo looks with a low and a high ISO. Of course the Shutter Speed was changes, to have the same amount of light on both photos.
Low ISO – Low Noise
High ISO – High Noise
You can easily notice that the first image is much cleaner and that the second one is with a lot of degradation in the details and colors.
When should you use Low ISO?
You should always use a low ISO whenever possible. If the photo is too dark, try a longer Shutter Speed or a higher Aperture (lower f/ number), if possible.
Example 1a: Static Scene (for example a Landscape) – If you can use a tripod, you can use a long Shutter Speed and lower the ISO.
Example 2a: Non-Static Scene (for example, a Person running) – If it’s during daylight, you can use a low ISO and a slow Shutter Speed, freezing the subject.
When should you use High ISO?
If the photo is too dark and you can’t use a longer Shutter Speed or a higher Aperture, then you must higher the ISO.
Example 1a: Static Scene (for example a Landscape) – If you don’t have a tripod available and you want to take a photo at sunset, you are limited by the Shutter Speed and the Aperture, then you must raise the ISO to have a well exposed photo.
Example 2a: Moving Scene (for example, a Person running) – If the scene is dark, you are limited by the Shutter Speed and the Aperture, then you must raise the ISO to have a well exposed photo.
The concept of ISO is easy to understand, what is more difficult is to learn how to use it at the beginning. In Automatic Mode the camera does this by itself (you can see on the properties of the photo, the ISO used by the camera). If you want to unlock the power of photographing in Manual Mode or “Semi-Manual” Mode (Shutter Priority Mode or Aperture Priority Mode), then you must know how to use the ISO.
You can read what Shutter Speed is, by clicking here.
Let me know what you thought about the Post, on the comment section below! I hope it helped you!
Happy shotting!
Luís Pina